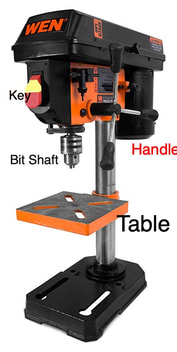
Drill Press
|
How to use:
Safety: Wear Safety Glasses. Loose sleeves and jewelry are secured. No gloves.Pay attention. No headphones. Be Aware of your surroundings
Fit the Bit: Open the chuck, slide in the bit, snug the chuck by hand around the bit’s shaft, then tighten the chuck’s three jaws with the key. Make sure to remove the chuck. If you don’t, it’ll become a dangerous projectile when you turn on the drill. When drilling large holes, drill a smaller, pilot hole first. Adjust the Table:Set the table to the desired height for the operation you are to perform. Our Table has a lever on the back left to unlock and tighten the table. Gauge the depth: In our case I would like you to test how low the drill bit goes when you turn the handle. Adjust the table to meet your needs. Secure the work: Using your hand to secure a piece of wood is acceptable. Keep your hand on the left and pressing down. You can also secure with a clamp. Never operate the tool without firmly anchoring the workpiece. Drill:Make sure the drill is spinning at full speed, then present the bit to the workpiece, lowering the bit by swinging the rotating lever. Once you’ve finished drilling the hole, release the pressure on the lever and its spring-loaded return mechanism will return it to its original position. When drilling metal you’ll need to establish a precise center point for the hole to be drilled. A punch can be used to make a tiny hollow to start the hole and keep your bit stable. -Bob Villa
|
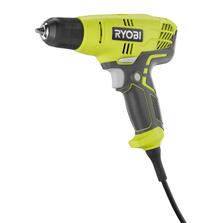
Drill
|
Steady the workpiece in a clamp or vise. Choose the right drill bits for your project. First, create an indent where you want to drill a hole If drilling a pilot hole, tape an “X” over the spot. Start slow. Mind your speed as you continue Never force the drill. Every inch or so that you drill, pull out the bit and blow it off. As the bit approaches the far side, drill more slowly Stop short for a cleaner cut. Safety: Keep long hair pulled back Keep your face away from the drill Be aware of your surroundings Drills should never face anyone or yourself. Corded Drills Watch cords and extension cords are not in the way Be sure the cords are not a tripping hazard. |
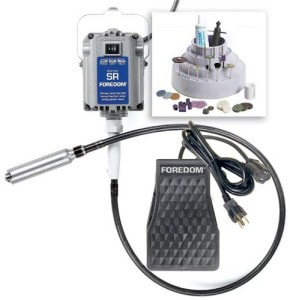
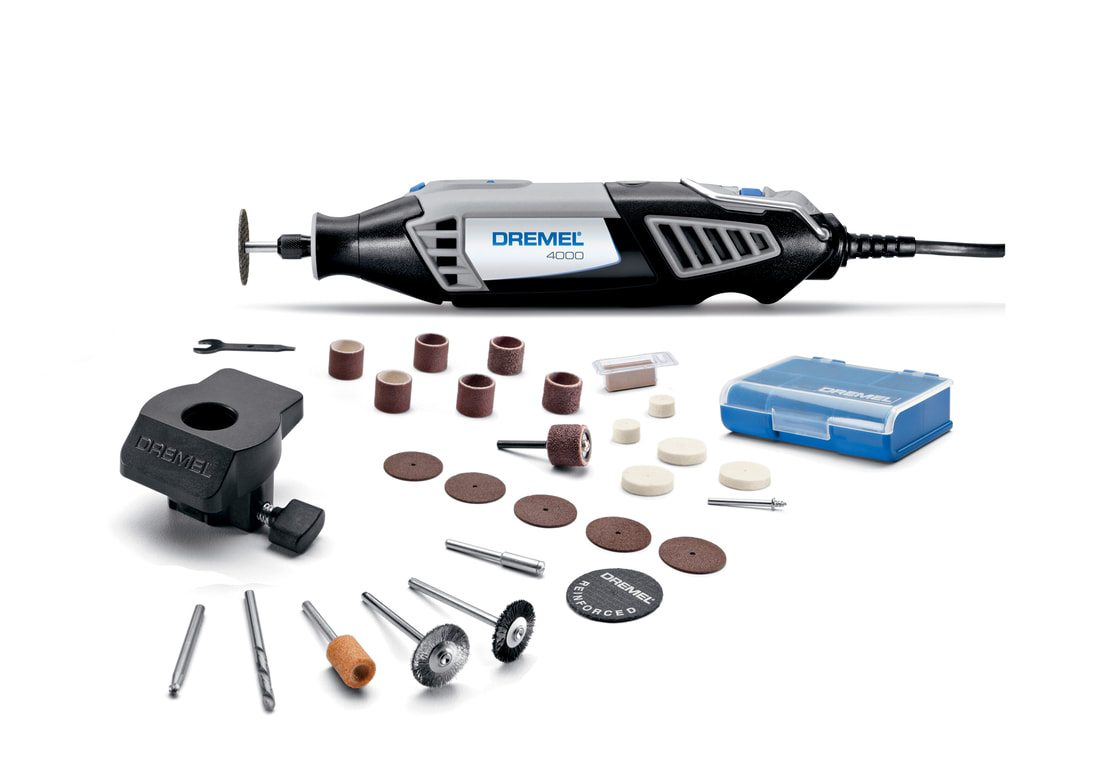
Flex Shaft Grinder
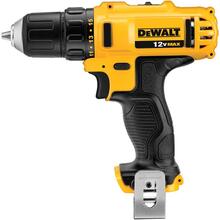
Dremel
|
Steady the workpiece in a clamp or vise on a scrap wood surface.
Choose the right drill bits, grinder, polishing, or other bit for your project. Different bits have different techniques. ASK for assistance. Start slow. Mind your speed as you continue Never force the dremel , the bit may fail and break. Every so often allow the bit and dremel to cool as to not overheat it. For prolonged use the Flex Shaft Grinder should be used. Safety: Keep long hair pulled back Keep your face away from the drill Be aware of your surroundings Dremelts should never face anyone or yourself. Watch Cords |
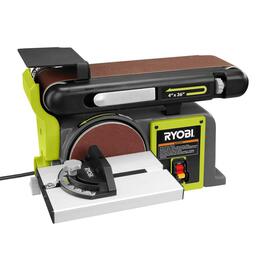
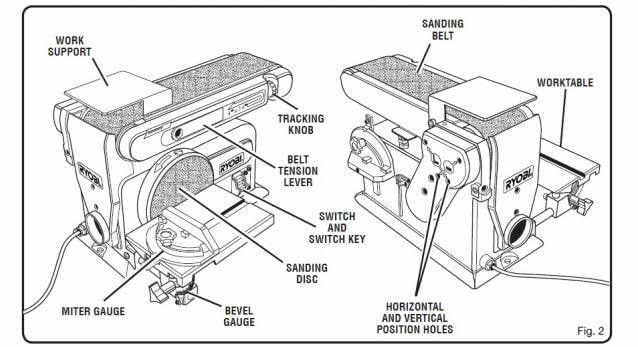
Belt and Disc Sander
|
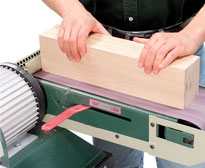
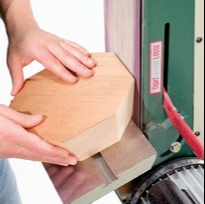
Disk Sander
The disc is great for precise edge work and trueing outside curves. Belt Sander
The belt allows you to flatten faces and edges, shape contours and smooth inside curves.
|
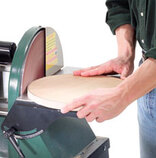
- Always wear proper eye and ear protection, and a dust mask.
- Keep your hands away from the disc! Mind the GAP. NO RISK TAKING
- Turn on the sander let the disc get up to speed, then begin. Don't turn on the power with the wood on the work space or touching the disk
- Never reach over the disc or behind it while it's running.
- Always sand on the downward motion side of the disc . The rotation helps to hold the workpiece against the table. If you sand on the upward motion side, the disc will lift the piece off the table and cause a kickback.
- Maintain a 1/16" maximum clearance between the worktable and the disc.
- Do not sand the end grain of 3/4" stock that is wider than 5-1/2". The rotation of the disc may lift wider boards off the table.
- Always use the worktable.
- Never sand without a table supporting the stock.
Palm Sander
|
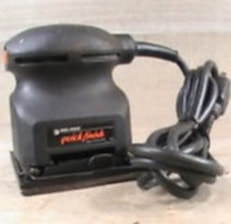
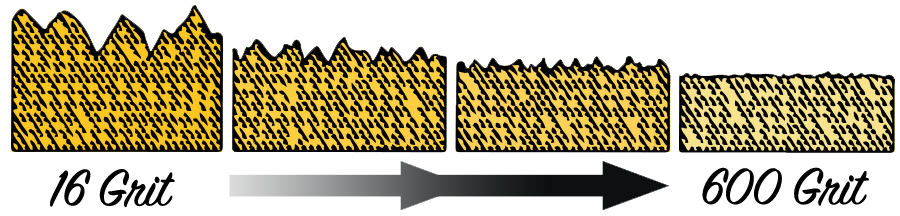
Palm sanders, also known as finish sanders, move the pad in small, circular orbits. Sandpaper attaches to a square pad on the bottom of the palm sander with these clamps. It’s extremely easy to handle and can use standard 9”x 11” sheet sandpaper cut to size. Wearing a mask is Very important if you are using the sander to strip varnish or paint. Understanding sandpaper. The higher the number, the smaller the grains and the finer the sandpaper grit. And, conversely, lower numbers indicate larger grains and overall coarser sandpaper. |
Sand Paper
Extra coarse sandpaper in the 24- to 36-grit range is tough stuff. It’s used for removing paint and varnish that you think might never come off.
Coarse sandpaper‘s strong suit is the rough shaping of wood and the removal of previous finishes, such as light coats of polyurethane. Coarse grits are typically in the 40- to 50-grit range.
Medium sandpaper, ranging from 60- to 100-grit, accommodates some final shaping. Primary sanding of rough wood and the removal of planning marks on wood is often best done with medium-grit sandpaper.
Fine sandpapers range from 120- to 220-grit. For most home workshops, this sandpaper will suffice for final sanding before the work is finished.
Extra fine sandpaper is often used between coats of paint or varnish. Grits of 240, 320 and 400 are termed very fine, while extra- or superfine sheets with grits of up to 600 are best-suited for polishing jobs.
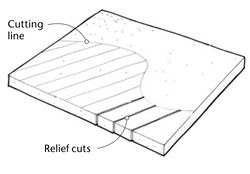
Band Saw
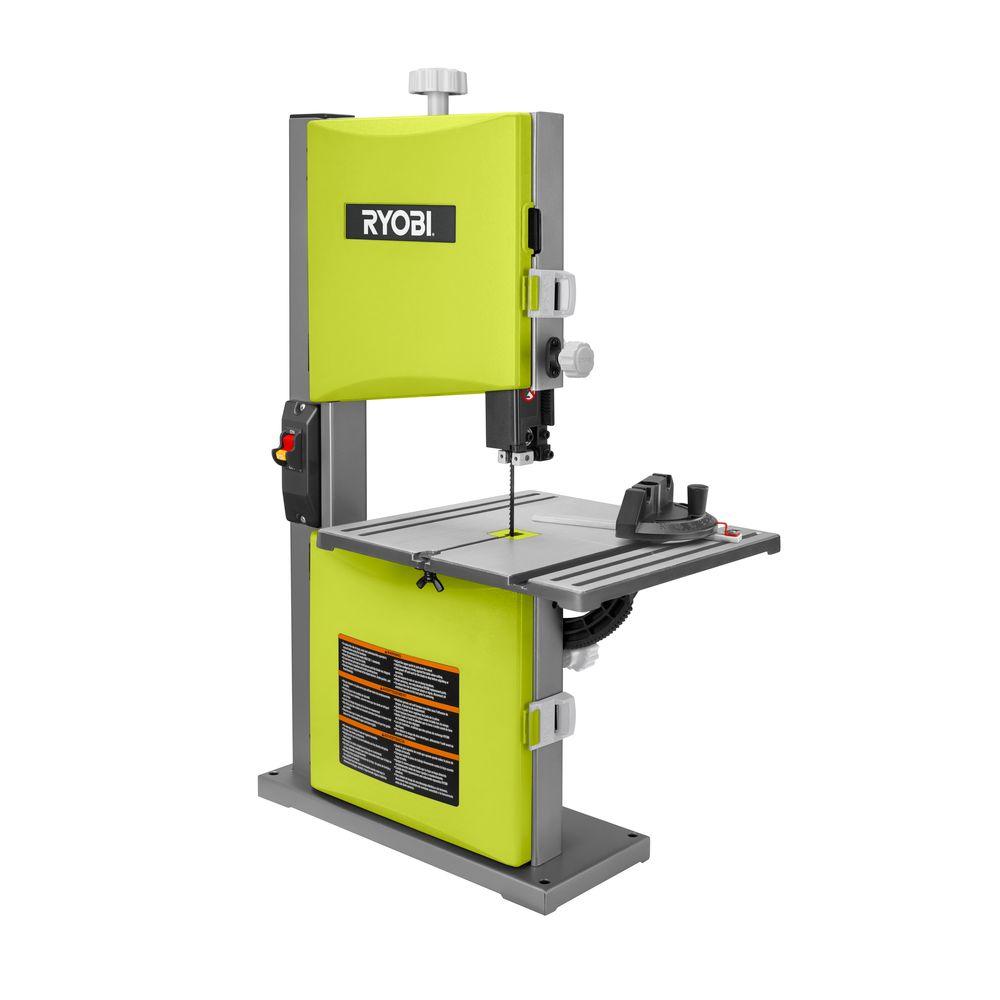

Relief Cuts-
|
Personal Safety:
Safety Glasses, Loose clothing and jewelry is secured or removed, No electronic devices. Planning: Plan cuts in advance. Mark your wood. Plan relief cuts to avoid sharp corners. Watch Video on Relief Cuts Complex curves should be broken up into several simple curves. Check the tools: Make sure there are no scrap pieces lodged between the blade and the throat plate opening. Plug in with Key out. Setting up BEFORE turning the band saw on, adjust the blade guide so that it is 1/8” above your stock. If the stock is uneven, adjust the blade guide for the thickest portion. Hand Placement: Keep fingers at least 2 inches away from the blade all the while you’re cutting stock using the band saw. Keep fingers to the sides of the blade. Left hand to the left of the blade, and right hand to the right of the blade. Ready to Saw: Concentrate, Concentrate, Concentrate. Do not let yourself become distracted at any time while operating the bandsaw. Keep your full attention on the stock, your line, and where your fingers are while cutting. Maintain the 2” margin of safety. Sawing NEVER turn the band saw on while stock is touching the blade. Turn the band saw on and wait until the saw has reached full speed before starting to cut your stock. A miter gauge or rip fence may be used to assist in guiding stock while making the cut. Never back out of a cut. If it does become necessary to back out of a cut, turn the band saw off, wait until it comes to a complete stop, and then slowly back the stock out. Just before the end of the cut, let up on the pressure you are applying so that your hand does not surge forward. Clearing wood cuts or chips: Turn off the saw. Take out the Key , Clear wood chip with 10 inch dowel rod. If a piece of wood gets trapped between the blade and the throat plate opening, turn the machine off, Ask teacher for assistance. DO not remove it yourself. Blade breakage: If a blade breaks during usage, turn the machine off, step back away from the machine, and notify the instructor. Do not install a new blade yourself. Always turn the band saw off and wait until it stops moving before making any adjustments that you are permitted to make. Finished: When finished working with the band saw, turn the machine off and remain in the work zone until it stops moving. Remove the key and secure it in its box at my desk. Clean up your wood scraps Clear the dust If you’re unsure about the application of any of these rules to your specific situation, ask the instructor. |
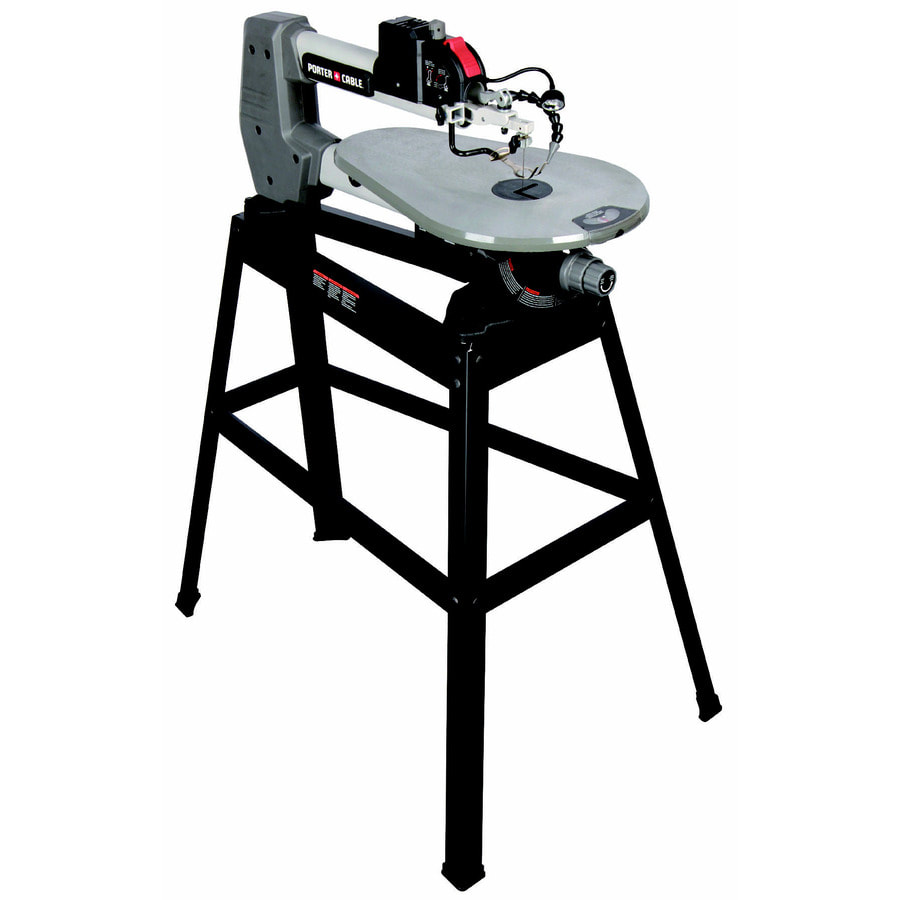
Scroll Saw- used for curved cutting
|
Choosing a blade:
|
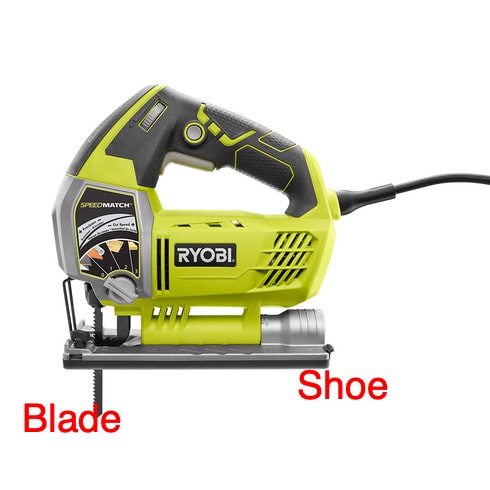
Jig Saw
|
Put safety first!Wear Eye protection. plug in an extension cord because jigsaw cords are relatively short. Keep the extension cord away from the cutting path. Keep cord away from pathways to avoid accidents
Position the shoe firmly. The Shoe(the metal base) must remain flat . Mark your materials. Position the front end of the shoe flat on the wood .D on’t let the saw blade touch the material before the jigsaw is running. Hold it back just a bit, turn on the tool, and then ease the jigsaw forward to begin the cut. Note: If the blade is touching the wood when you turn the saw on, the blade can catch on the wood, jerking the saw and breaking the blade or cutting in the wrong spot. Drill first to cut center holes. To cut a hole in the center of your material drill a 1/2 inch starter hole before using a jigsaw. Insert the jigsaw blade in the hole and start cutting there. Don’t turn the saw on until the blade is all the way in the hole and the shoe is resting on the material’s surface. |
|
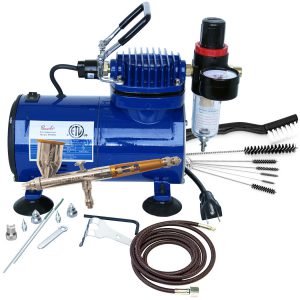
AirbrushWe only use acrylic airbrush paints and liquid watercolor in our airbrushes at school. You will be required to wear a mask while operating this tool because particulate is being sprayed into the air.
Once trained on this tool you will be allowed to use it for your projects. Beginners: How to use the airbrush-Link Airbrushes need extensive cleaning once you complete working with it or it will be damaged. How to clean the airbrush.-Link |

|
Compressor and Glaze SprayerBe sure to check the list of glazes and underglazes that are allowed to be sprayed.
Be sure to sieve your glaze Get a face mask or goggles Wear your respirator or the small particle mask. Empty your glaze in the receptacle Attach the jar to the nozzle sprayer. Turn on the compressor( with the teacher present) Allow the pressure to accumulate Test spray into a water bowl. When ready begin spraying your glazes. Turn off the compressor when done or when you need to ungclog the sprayer The pop up spray booth is to be used outside of the classroom and preferably on the patio The sprayer should never be sprayed at anyone or in anyone space. This is a choice and you will have consequences. |
