Stone CarvingProminences on the Human Face:
Tip of the Nose Chin Lips Forehead Tips of ears Jaw Slope of Nose All of the Angles |
A Continuous Shape from Eyes & Ears on Vimeo. |
Carving Soap Stone
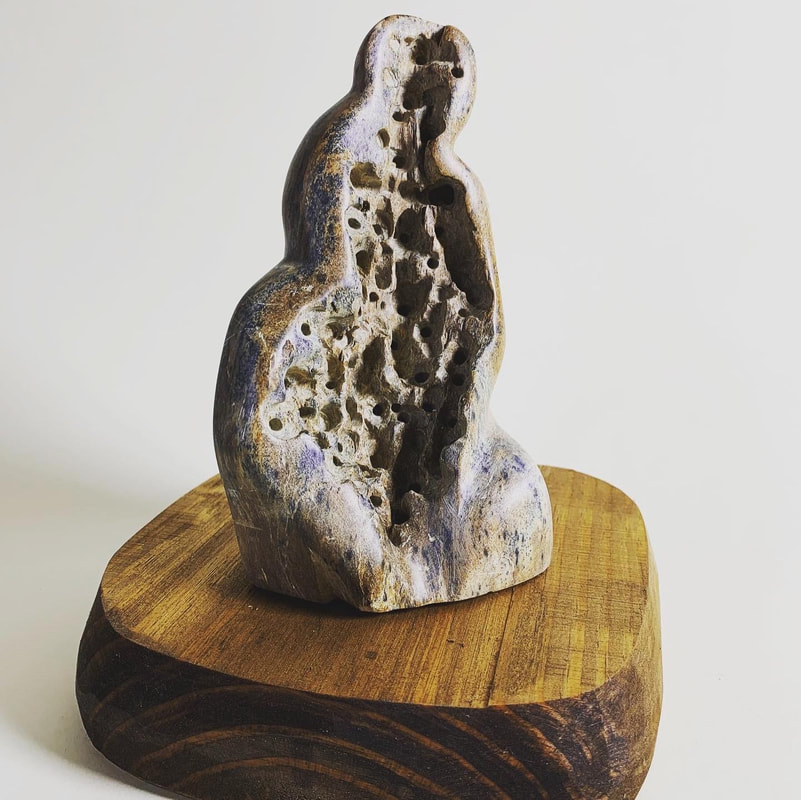
Student Examples
|
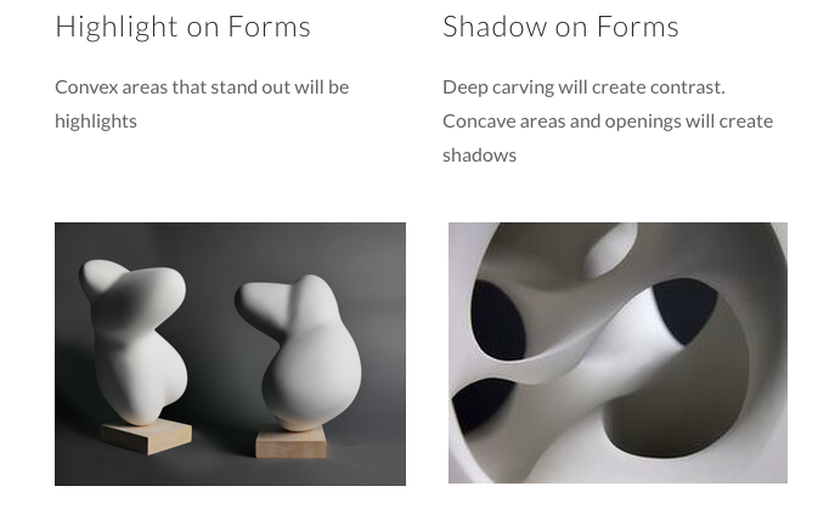
Draw First: Look Closely at your model Find the Prominent areas Plan with a clay model first Move on to Stone. |
Soapstone is actually talc (the stuff in baby powder). According to the Mohs rock hardness scale, talc is the softest rock, whereas a diamond is the hardest. Any drop, scratch, or scrape will damage the rock. You can actually scratch the surface of the rock with your fingernail.
Plan ahead so you can pick a stone that works for your form.
|
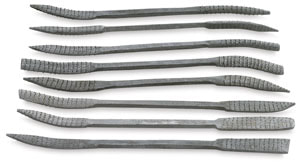
RaspsAlways slide the file or rasp forward, away from you. Lift it off the stone, return to the starting position and slide forward again until you’ve skinned away as much as you want to. Don’t use a lot of pressure—let the tool do the work. And don’t take the surface down too far, either.
|
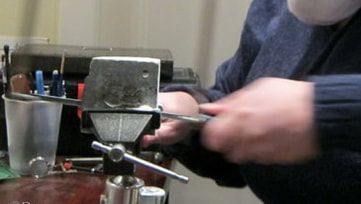
SawingIf you’re using a saw, remember to line it up beside your body, like a pool cue. Push forward, pull back in a straight line. Let the saw do the work. If it wants to buckle, you’re pushing way too hard.
|
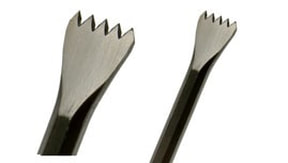
ChiselsSlide chisels away from the body, and keep your fingers and hands out of the way. It is too easy for your hand to slip. Let the tool hit air and not a body part. It takes a little practice, but a lot of respect
A wood saw can be used to cut off big sections to bring your shape closer to the finished product, and will save a lot of time.. |
Personal Safety
Eye protection
Dust Mask or respirator'
Work in a well ventilated area( patio)
Dust Mask or respirator'
Work in a well ventilated area( patio)
Getting Started
Soapstone will never achieve the precision details of harder stones.
Start blobby and then refine your carving as you learn how to use the tools and how your particular stone handles.
Then it’s start big and work smaller, from the larger knives and chisels to the smaller
Start blobby and then refine your carving as you learn how to use the tools and how your particular stone handles.
Then it’s start big and work smaller, from the larger knives and chisels to the smaller
Finishing Processes- Sanding and Surface
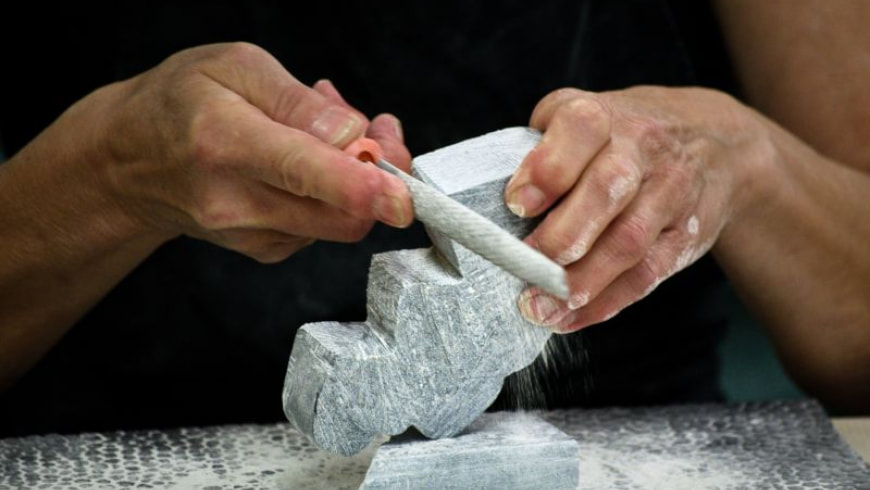
Sand using wet-dry sandpaper cut into small bits to get into all the crevices.
You can finish with an 800-grit, sand with water to be sure dust is trapped in water.
Next, use a very soft toothbrush or art brush under running water to thoroughly clean the dust off the carving.
A non-toxic but less protective method is to use a beeswax product designed for finishing salad bowls. It’s food safe and nice on the hands, too.
Clean Up
Using a wet rag to control the dust is the best tool for the job.
Avoid using bench brushes, they kick up dust.
Avoid using bench brushes, they kick up dust.
Personal Care
Your hands will get dry after carving. Lotion is near the sink.
If a tool slips and you require a bandaid please go to the desk first aid area.
If the cut is bad a buddy will walk with you to the nurse.
If a tool slips and you require a bandaid please go to the desk first aid area.
If the cut is bad a buddy will walk with you to the nurse.
